Lectric eBikes Legacy Orbitor
Legacy Orbitor
For Lectric eBikes products, we are no longer able to sell them online. They are only available for purchase in person at our warehouse.
XPedition 1.0 Accessory
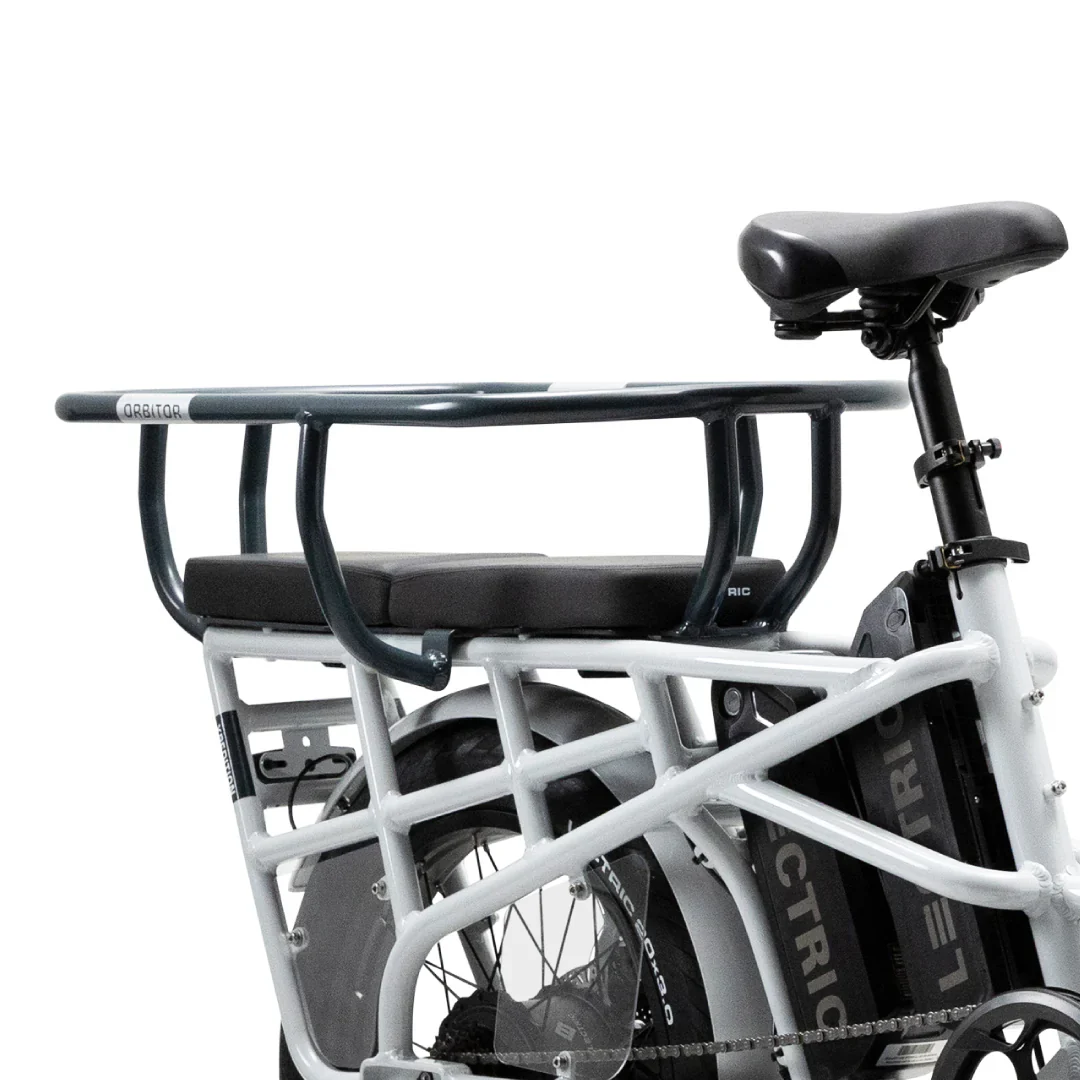
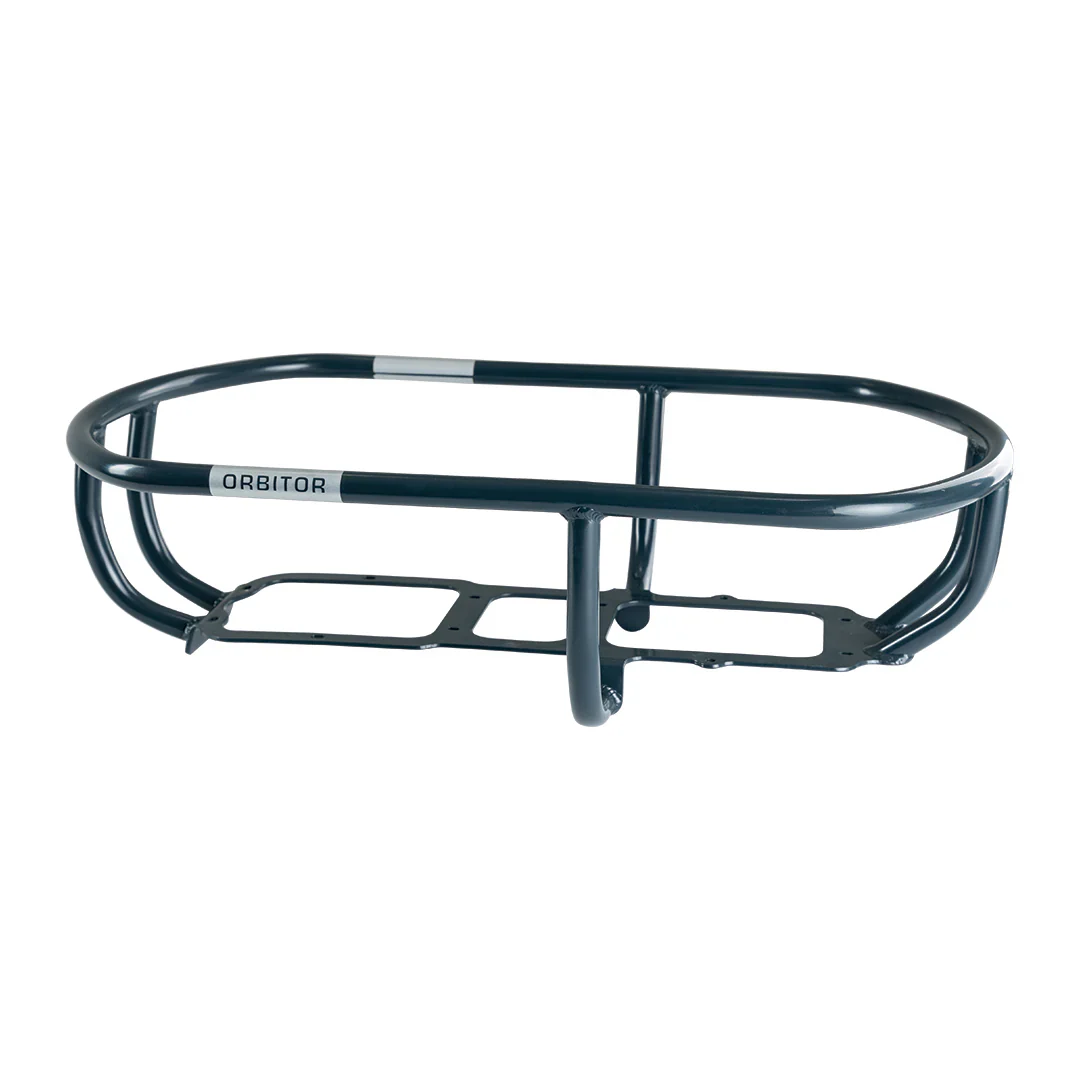
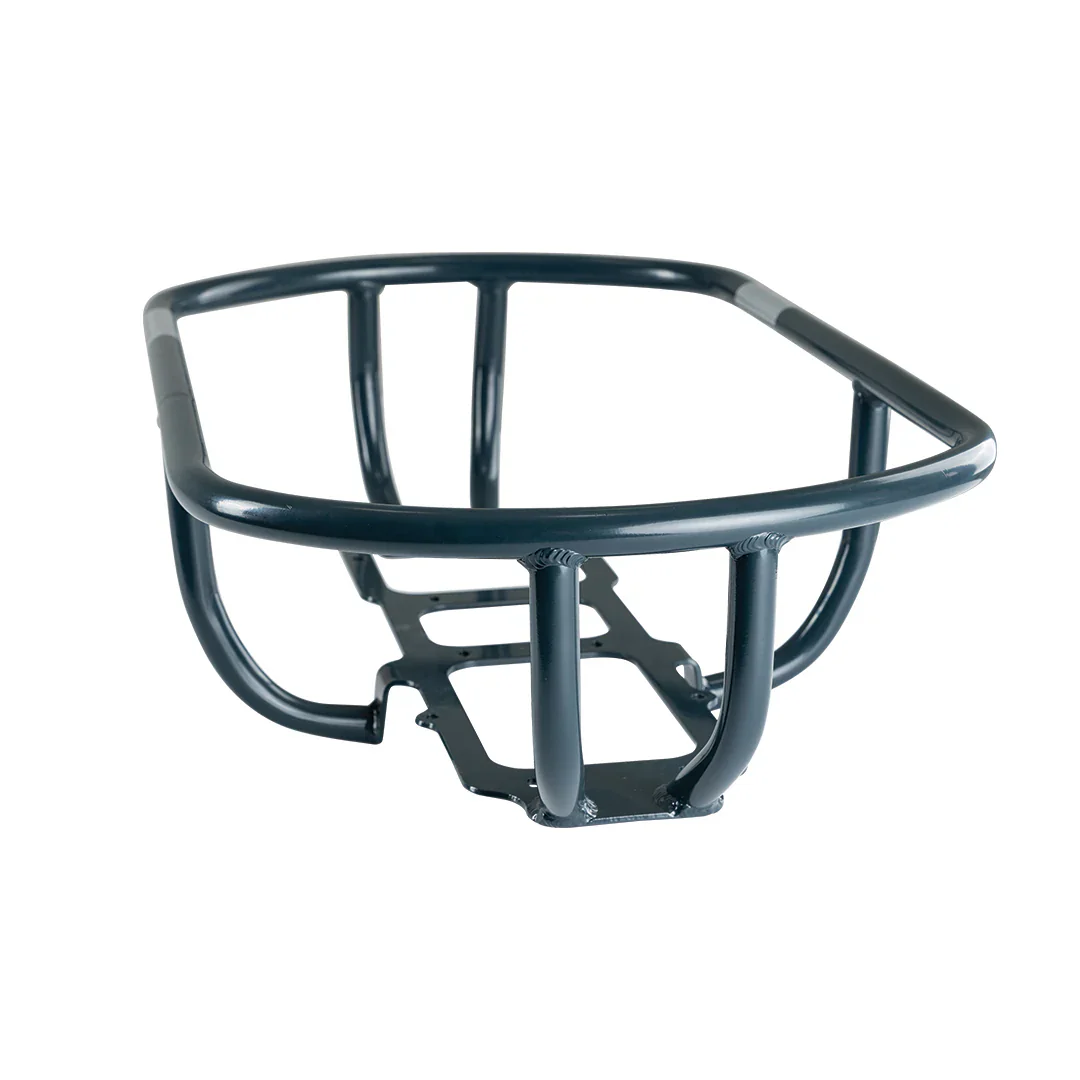
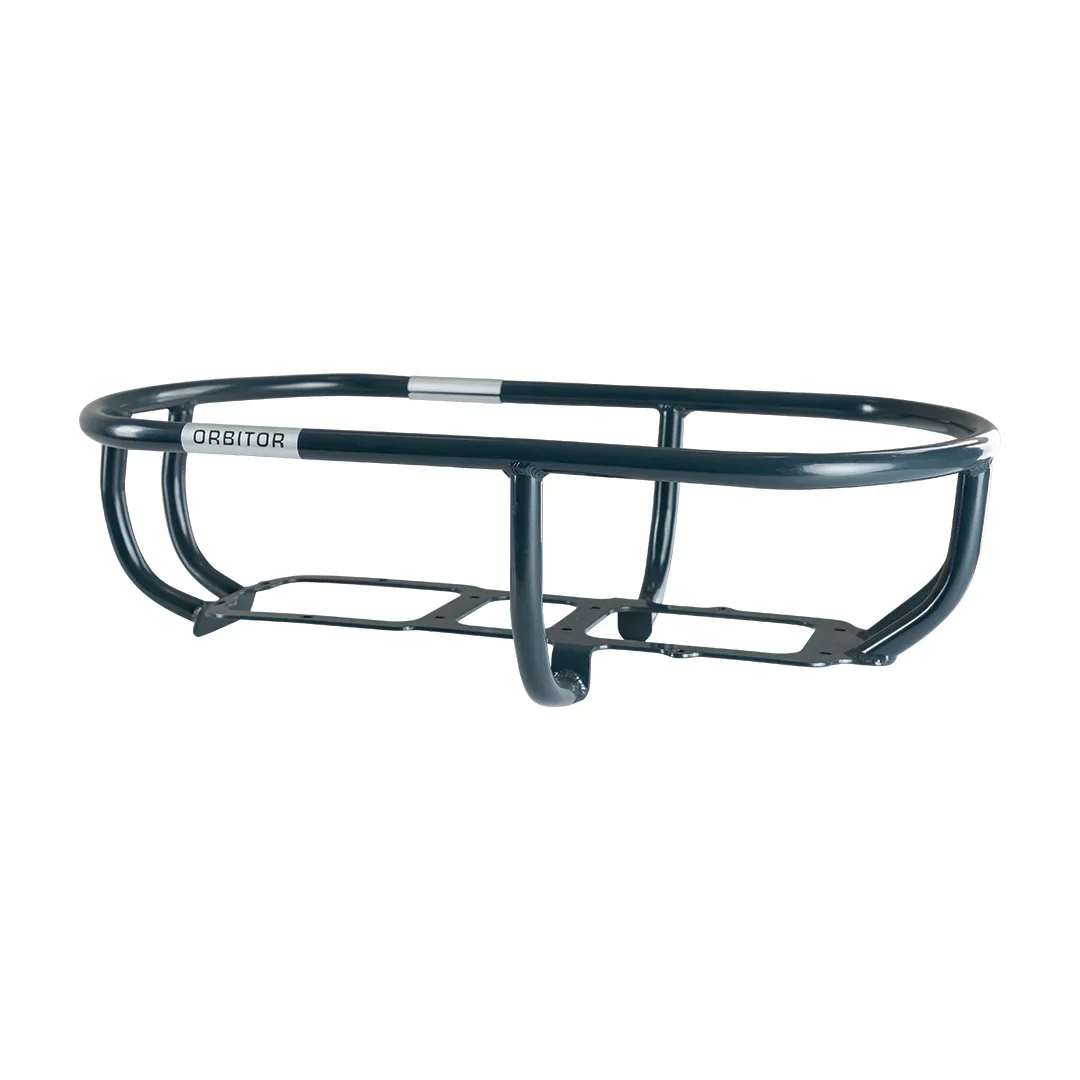
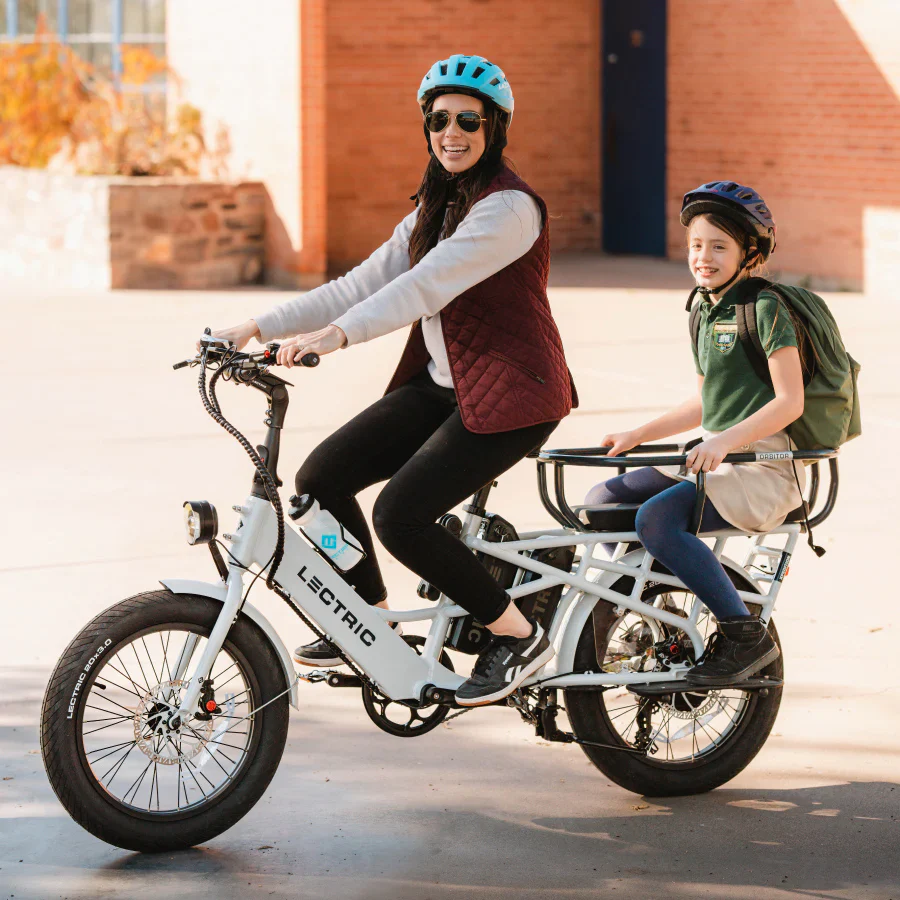
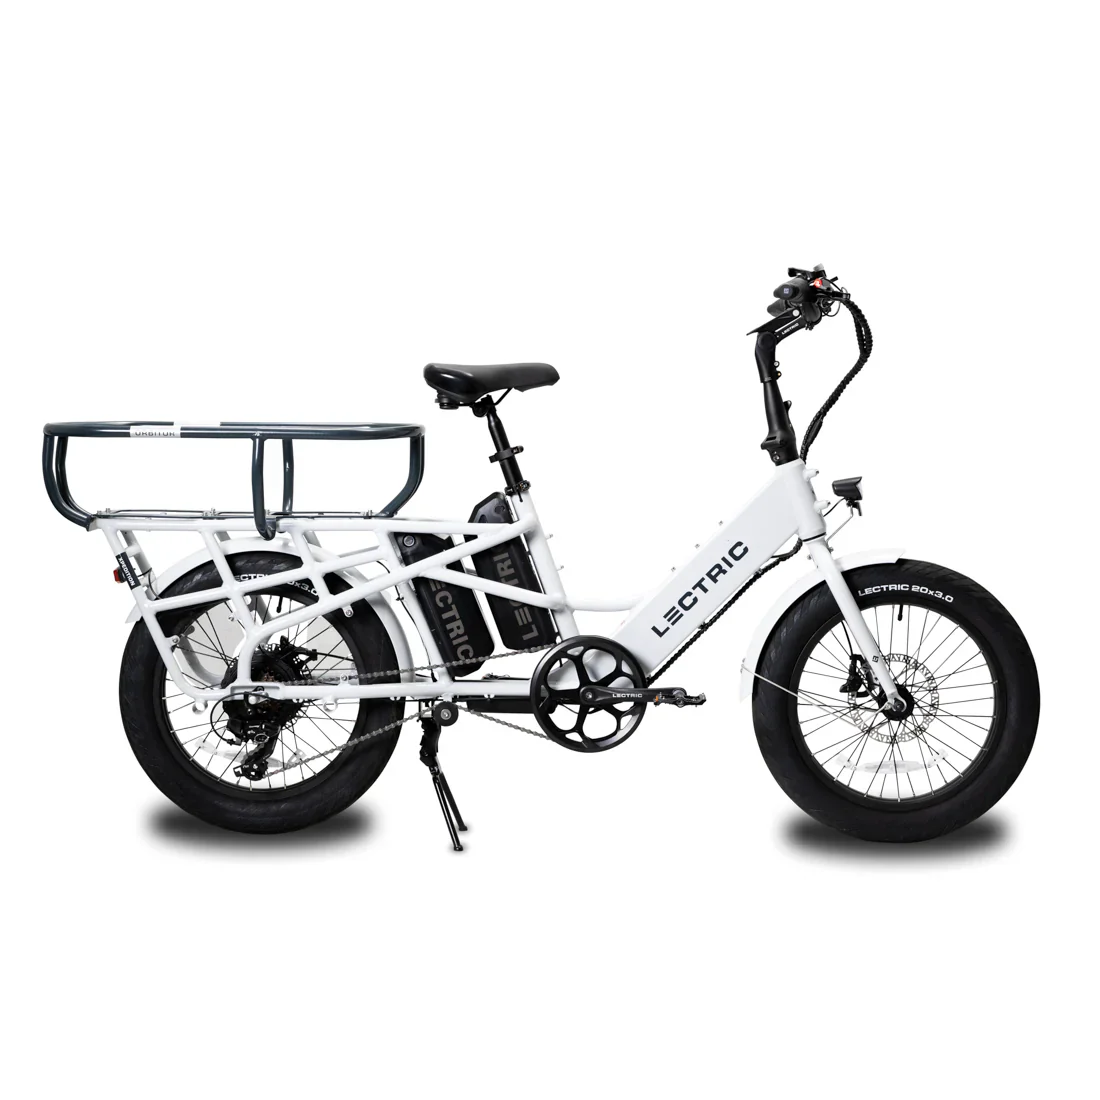
Looking for a catch-all cargo solution? The Orbitor will keep small kiddos and hefty cargo loads in check while you're in motion!
- Sturdy aluminum material is durable and in it for the long run.
- Easy installation with just 4 screws.
- Use the Orbitor with Cushions, Running Boards, XL Pannier Bags, Cargo Net, Cargo Straps, & more!
Please note that Lectric have a strict no-return policy on accessories.
*Product Requirements:
- The Orbitor is recommended to be used with the Cushions and Running Boards (sold separately) when carrying passengers.
Compatibility:
- Lectric XPedition 1.0 only
⚠️ Warning:
It is always the user’s responsibility to ensure the passenger and/or cargo loaded on the Lectric XPedition do not interfere or impact the user’s ability to safely operate the Lectric XPedition.
You MUST hold onto the Lectric XPedition whenever loading cargo and/or a passenger. The kickstand is not designed to be used for loading cargo. Do not assume the bike is stable and balanced when using the kickstand. Always hold onto the bike when cargo is being loaded, in place, or attached to the bike.
Please read the Lectric XPedition Manual for more information.
Click to download > XPedition 1.0 User Manual
Click to download > XPedition 2.0 User Manual
**A passenger incapable of riding a bike on their own should not ride as a passenger. Use your best judgment as a parent or guardian to keep a child or an adult passenger and the rider safe.
Not compatible with Thule Yepp 2 Maxi Seat.
What's in the Box:
- Orbitor Frame
- (4) M6 Bolts
- (4) 10 mm Securing Nuts
Product Specifications:
- Material: 6000 Series Aluminum
- Weight: 3.7 lbs (1.65kgs)
- Outer Dimensions: 29" L x 17" W x 7" H
- Inner Dimensions: 27" L x 15" W x 6" H
- Navy Blue
Instructions:
- Installation instructions for the Orbitor found below
Orbitor Installation
Looking for a catch-all cargo solution? The Orbitor will keep small kiddos and hefty cargo loads in check while you're in motion!
Orbitor Installation on XPedition 2.0:
Notice: Installation can be completed on your own but we recommend using a friend to help make things easier!
Click here to watch the Lectric Service Center video tutorial on Youtube.
What's in the box:
- Orbitor Base Frame
- Rear Verticle Mount (features Yepp Window)
- Front Verticle Mount
- XPedition Cushion Backrest (Installation Optional)
- (6) M6 x 45mm bolts (5mm head)
- (6) M6 Washers
- (4) M5 x 16mm bolts (4mm head)
- (5) M5 Washers
- (2) 16mm (Outer-Diameter) M6 washers
- (2) M6 Nylock Nuts
- (12) M5 x 10mm bolts (for accessory mounts)
Written Instructions:
1. Begin by locating the Rear Verticle Mount. The rear mount will feature a Yepp Window in the center that looks like a square in the frame, while the front mount will not have a Yepp Window. (The Yepp Window is used to install the backrest cushion).
2. Once you have located the Rear Verticle Mount, next, grab the Orbitor Base Frame and have the frame with the arms oriented down.
3. Push the M6 bolts through the Orbitor Base Frame and the Rear Verticle Mount. Then use a 5mm allen wrench to loosely secure them but do not tighten all the way.
Notice: It does not matter which side you install the Front or Rear Mounts.
4. Repeat step 3 with the front mount to finish assembling the Orbitor.
5. Before we begin to install the Orbitor Frame onto the rear rack, we will want to remove the 4 bolts that are installed on the rear rack of the XPedition.
6. To attach the Orbitor to the bike, place on XPedition 2.0 rear rack, aligning the slots of the Orbitor to the frame bosses. The rear side should be on the outside of the last bar in the frame and the front side should be hooked on the first bar on the rear rack.
7. Next, install the 16mm bolts to the frame with the M5 Washers but do not fully tighten.
8. Align the Front and Rear Vertical Mounts with M6 horizontal mounts. Loosely thread the 45mm M6 bolts paired with the 16mm washer.
9. Add the nylock nut and M6 washer to the bolts at the bottom of the vertical mount from the frame side.
10. Tighten to all torque specs;
- Torque the M6 45mm bolts into the horizontal mounts to 10-12Nm.
- Torque the 16mm M5 bolts to 5-6Nm.
- Torque the 45mm M6 Orbitor Frame bolts to 10-12Nm.
11. Perform a light pull test to check the installation is secure.
12. After the Orbitor is installed, other accessories can be installed like the cushions or the Thule Yepp Maxi Child's Seat.
Legacy Orbitor Installation on XPedition 1.0:
Click here to watch the Lectric Service Center video tutorial on Youtube.
Written Instructions:
1. On the rear rack, there are (8) pre-installed bolts. Remove the (8) bolts with a 4mm Allen key and set them aside.
2. Place the Orbitor on the rack, aligning the holes to the 12 mounting bosses on the rear rack.
3. Use a 4mm Allen key and the 8 bolts from earlier to secure the middle mounting positions. Be sure to tighten the bolts equally in intervals until they are all fully secure.
4. The Orbitor comes with (4) bolts & (4) securing nuts. Thread the 4 bolts into the outer mounting bosses using a 5mm Allen Key.
5. Next, use a 10mm box wrench to secure the 4 nuts onto the bottom side of the 4 bolts until tight.
6. After the Orbitor is installed, other accessories can be installed like the cushions or the Thule Yepp Maxi Child's Seat.
It is always the user’s responsibility to ensure the passenger and/or cargo loaded on the Lectric XPedition do not interfere or impact the user’s ability to safely operate the Lectric XPedition.
Please read the Lectric XPedition Owners Manual for more information.
Product Information
Product Information
Shipping & Returns
Shipping & Returns

Lectric eBikes Legacy Orbitor
Lectric eBikes Legacy Orbitor
Legacy Orbitor
For Lectric eBikes products, we are no longer able to sell them online. They are only available for purchase in person at our warehouse.
XPedition 1.0 Accessory
Looking for a catch-all cargo solution? The Orbitor will keep small kiddos and hefty cargo loads in check while you're in motion!
- Sturdy aluminum material is durable and in it for the long run.
- Easy installation with just 4 screws.
- Use the Orbitor with Cushions, Running Boards, XL Pannier Bags, Cargo Net, Cargo Straps, & more!
Please note that Lectric have a strict no-return policy on accessories.
*Product Requirements:
- The Orbitor is recommended to be used with the Cushions and Running Boards (sold separately) when carrying passengers.
Compatibility:
- Lectric XPedition 1.0 only
⚠️ Warning:
It is always the user’s responsibility to ensure the passenger and/or cargo loaded on the Lectric XPedition do not interfere or impact the user’s ability to safely operate the Lectric XPedition.
You MUST hold onto the Lectric XPedition whenever loading cargo and/or a passenger. The kickstand is not designed to be used for loading cargo. Do not assume the bike is stable and balanced when using the kickstand. Always hold onto the bike when cargo is being loaded, in place, or attached to the bike.
Please read the Lectric XPedition Manual for more information.
Click to download > XPedition 1.0 User Manual
Click to download > XPedition 2.0 User Manual
**A passenger incapable of riding a bike on their own should not ride as a passenger. Use your best judgment as a parent or guardian to keep a child or an adult passenger and the rider safe.
Not compatible with Thule Yepp 2 Maxi Seat.
What's in the Box:
- Orbitor Frame
- (4) M6 Bolts
- (4) 10 mm Securing Nuts
Product Specifications:
- Material: 6000 Series Aluminum
- Weight: 3.7 lbs (1.65kgs)
- Outer Dimensions: 29" L x 17" W x 7" H
- Inner Dimensions: 27" L x 15" W x 6" H
- Navy Blue
Instructions:
- Installation instructions for the Orbitor found below
Orbitor Installation
Looking for a catch-all cargo solution? The Orbitor will keep small kiddos and hefty cargo loads in check while you're in motion!
Orbitor Installation on XPedition 2.0:
Notice: Installation can be completed on your own but we recommend using a friend to help make things easier!
Click here to watch the Lectric Service Center video tutorial on Youtube.
What's in the box:
- Orbitor Base Frame
- Rear Verticle Mount (features Yepp Window)
- Front Verticle Mount
- XPedition Cushion Backrest (Installation Optional)
- (6) M6 x 45mm bolts (5mm head)
- (6) M6 Washers
- (4) M5 x 16mm bolts (4mm head)
- (5) M5 Washers
- (2) 16mm (Outer-Diameter) M6 washers
- (2) M6 Nylock Nuts
- (12) M5 x 10mm bolts (for accessory mounts)
Written Instructions:
1. Begin by locating the Rear Verticle Mount. The rear mount will feature a Yepp Window in the center that looks like a square in the frame, while the front mount will not have a Yepp Window. (The Yepp Window is used to install the backrest cushion).
2. Once you have located the Rear Verticle Mount, next, grab the Orbitor Base Frame and have the frame with the arms oriented down.
3. Push the M6 bolts through the Orbitor Base Frame and the Rear Verticle Mount. Then use a 5mm allen wrench to loosely secure them but do not tighten all the way.
Notice: It does not matter which side you install the Front or Rear Mounts.
4. Repeat step 3 with the front mount to finish assembling the Orbitor.
5. Before we begin to install the Orbitor Frame onto the rear rack, we will want to remove the 4 bolts that are installed on the rear rack of the XPedition.
6. To attach the Orbitor to the bike, place on XPedition 2.0 rear rack, aligning the slots of the Orbitor to the frame bosses. The rear side should be on the outside of the last bar in the frame and the front side should be hooked on the first bar on the rear rack.
7. Next, install the 16mm bolts to the frame with the M5 Washers but do not fully tighten.
8. Align the Front and Rear Vertical Mounts with M6 horizontal mounts. Loosely thread the 45mm M6 bolts paired with the 16mm washer.
9. Add the nylock nut and M6 washer to the bolts at the bottom of the vertical mount from the frame side.
10. Tighten to all torque specs;
- Torque the M6 45mm bolts into the horizontal mounts to 10-12Nm.
- Torque the 16mm M5 bolts to 5-6Nm.
- Torque the 45mm M6 Orbitor Frame bolts to 10-12Nm.
11. Perform a light pull test to check the installation is secure.
12. After the Orbitor is installed, other accessories can be installed like the cushions or the Thule Yepp Maxi Child's Seat.
Legacy Orbitor Installation on XPedition 1.0:
Click here to watch the Lectric Service Center video tutorial on Youtube.
Written Instructions:
1. On the rear rack, there are (8) pre-installed bolts. Remove the (8) bolts with a 4mm Allen key and set them aside.
2. Place the Orbitor on the rack, aligning the holes to the 12 mounting bosses on the rear rack.
3. Use a 4mm Allen key and the 8 bolts from earlier to secure the middle mounting positions. Be sure to tighten the bolts equally in intervals until they are all fully secure.
4. The Orbitor comes with (4) bolts & (4) securing nuts. Thread the 4 bolts into the outer mounting bosses using a 5mm Allen Key.
5. Next, use a 10mm box wrench to secure the 4 nuts onto the bottom side of the 4 bolts until tight.
6. After the Orbitor is installed, other accessories can be installed like the cushions or the Thule Yepp Maxi Child's Seat.
It is always the user’s responsibility to ensure the passenger and/or cargo loaded on the Lectric XPedition do not interfere or impact the user’s ability to safely operate the Lectric XPedition.
Please read the Lectric XPedition Owners Manual for more information.
Original: $119.00
-65%$119.00
$41.65Product Information
Product Information
Shipping & Returns
Shipping & Returns
Description
Legacy Orbitor
For Lectric eBikes products, we are no longer able to sell them online. They are only available for purchase in person at our warehouse.
XPedition 1.0 Accessory
Looking for a catch-all cargo solution? The Orbitor will keep small kiddos and hefty cargo loads in check while you're in motion!
- Sturdy aluminum material is durable and in it for the long run.
- Easy installation with just 4 screws.
- Use the Orbitor with Cushions, Running Boards, XL Pannier Bags, Cargo Net, Cargo Straps, & more!
Please note that Lectric have a strict no-return policy on accessories.
*Product Requirements:
- The Orbitor is recommended to be used with the Cushions and Running Boards (sold separately) when carrying passengers.
Compatibility:
- Lectric XPedition 1.0 only
⚠️ Warning:
It is always the user’s responsibility to ensure the passenger and/or cargo loaded on the Lectric XPedition do not interfere or impact the user’s ability to safely operate the Lectric XPedition.
You MUST hold onto the Lectric XPedition whenever loading cargo and/or a passenger. The kickstand is not designed to be used for loading cargo. Do not assume the bike is stable and balanced when using the kickstand. Always hold onto the bike when cargo is being loaded, in place, or attached to the bike.
Please read the Lectric XPedition Manual for more information.
Click to download > XPedition 1.0 User Manual
Click to download > XPedition 2.0 User Manual
**A passenger incapable of riding a bike on their own should not ride as a passenger. Use your best judgment as a parent or guardian to keep a child or an adult passenger and the rider safe.
Not compatible with Thule Yepp 2 Maxi Seat.
What's in the Box:
- Orbitor Frame
- (4) M6 Bolts
- (4) 10 mm Securing Nuts
Product Specifications:
- Material: 6000 Series Aluminum
- Weight: 3.7 lbs (1.65kgs)
- Outer Dimensions: 29" L x 17" W x 7" H
- Inner Dimensions: 27" L x 15" W x 6" H
- Navy Blue
Instructions:
- Installation instructions for the Orbitor found below
Orbitor Installation
Looking for a catch-all cargo solution? The Orbitor will keep small kiddos and hefty cargo loads in check while you're in motion!
Orbitor Installation on XPedition 2.0:
Notice: Installation can be completed on your own but we recommend using a friend to help make things easier!
Click here to watch the Lectric Service Center video tutorial on Youtube.
What's in the box:
- Orbitor Base Frame
- Rear Verticle Mount (features Yepp Window)
- Front Verticle Mount
- XPedition Cushion Backrest (Installation Optional)
- (6) M6 x 45mm bolts (5mm head)
- (6) M6 Washers
- (4) M5 x 16mm bolts (4mm head)
- (5) M5 Washers
- (2) 16mm (Outer-Diameter) M6 washers
- (2) M6 Nylock Nuts
- (12) M5 x 10mm bolts (for accessory mounts)
Written Instructions:
1. Begin by locating the Rear Verticle Mount. The rear mount will feature a Yepp Window in the center that looks like a square in the frame, while the front mount will not have a Yepp Window. (The Yepp Window is used to install the backrest cushion).
2. Once you have located the Rear Verticle Mount, next, grab the Orbitor Base Frame and have the frame with the arms oriented down.
3. Push the M6 bolts through the Orbitor Base Frame and the Rear Verticle Mount. Then use a 5mm allen wrench to loosely secure them but do not tighten all the way.
Notice: It does not matter which side you install the Front or Rear Mounts.
4. Repeat step 3 with the front mount to finish assembling the Orbitor.
5. Before we begin to install the Orbitor Frame onto the rear rack, we will want to remove the 4 bolts that are installed on the rear rack of the XPedition.
6. To attach the Orbitor to the bike, place on XPedition 2.0 rear rack, aligning the slots of the Orbitor to the frame bosses. The rear side should be on the outside of the last bar in the frame and the front side should be hooked on the first bar on the rear rack.
7. Next, install the 16mm bolts to the frame with the M5 Washers but do not fully tighten.
8. Align the Front and Rear Vertical Mounts with M6 horizontal mounts. Loosely thread the 45mm M6 bolts paired with the 16mm washer.
9. Add the nylock nut and M6 washer to the bolts at the bottom of the vertical mount from the frame side.
10. Tighten to all torque specs;
- Torque the M6 45mm bolts into the horizontal mounts to 10-12Nm.
- Torque the 16mm M5 bolts to 5-6Nm.
- Torque the 45mm M6 Orbitor Frame bolts to 10-12Nm.
11. Perform a light pull test to check the installation is secure.
12. After the Orbitor is installed, other accessories can be installed like the cushions or the Thule Yepp Maxi Child's Seat.
Legacy Orbitor Installation on XPedition 1.0:
Click here to watch the Lectric Service Center video tutorial on Youtube.
Written Instructions:
1. On the rear rack, there are (8) pre-installed bolts. Remove the (8) bolts with a 4mm Allen key and set them aside.
2. Place the Orbitor on the rack, aligning the holes to the 12 mounting bosses on the rear rack.
3. Use a 4mm Allen key and the 8 bolts from earlier to secure the middle mounting positions. Be sure to tighten the bolts equally in intervals until they are all fully secure.
4. The Orbitor comes with (4) bolts & (4) securing nuts. Thread the 4 bolts into the outer mounting bosses using a 5mm Allen Key.
5. Next, use a 10mm box wrench to secure the 4 nuts onto the bottom side of the 4 bolts until tight.
6. After the Orbitor is installed, other accessories can be installed like the cushions or the Thule Yepp Maxi Child's Seat.
It is always the user’s responsibility to ensure the passenger and/or cargo loaded on the Lectric XPedition do not interfere or impact the user’s ability to safely operate the Lectric XPedition.
Please read the Lectric XPedition Owners Manual for more information.