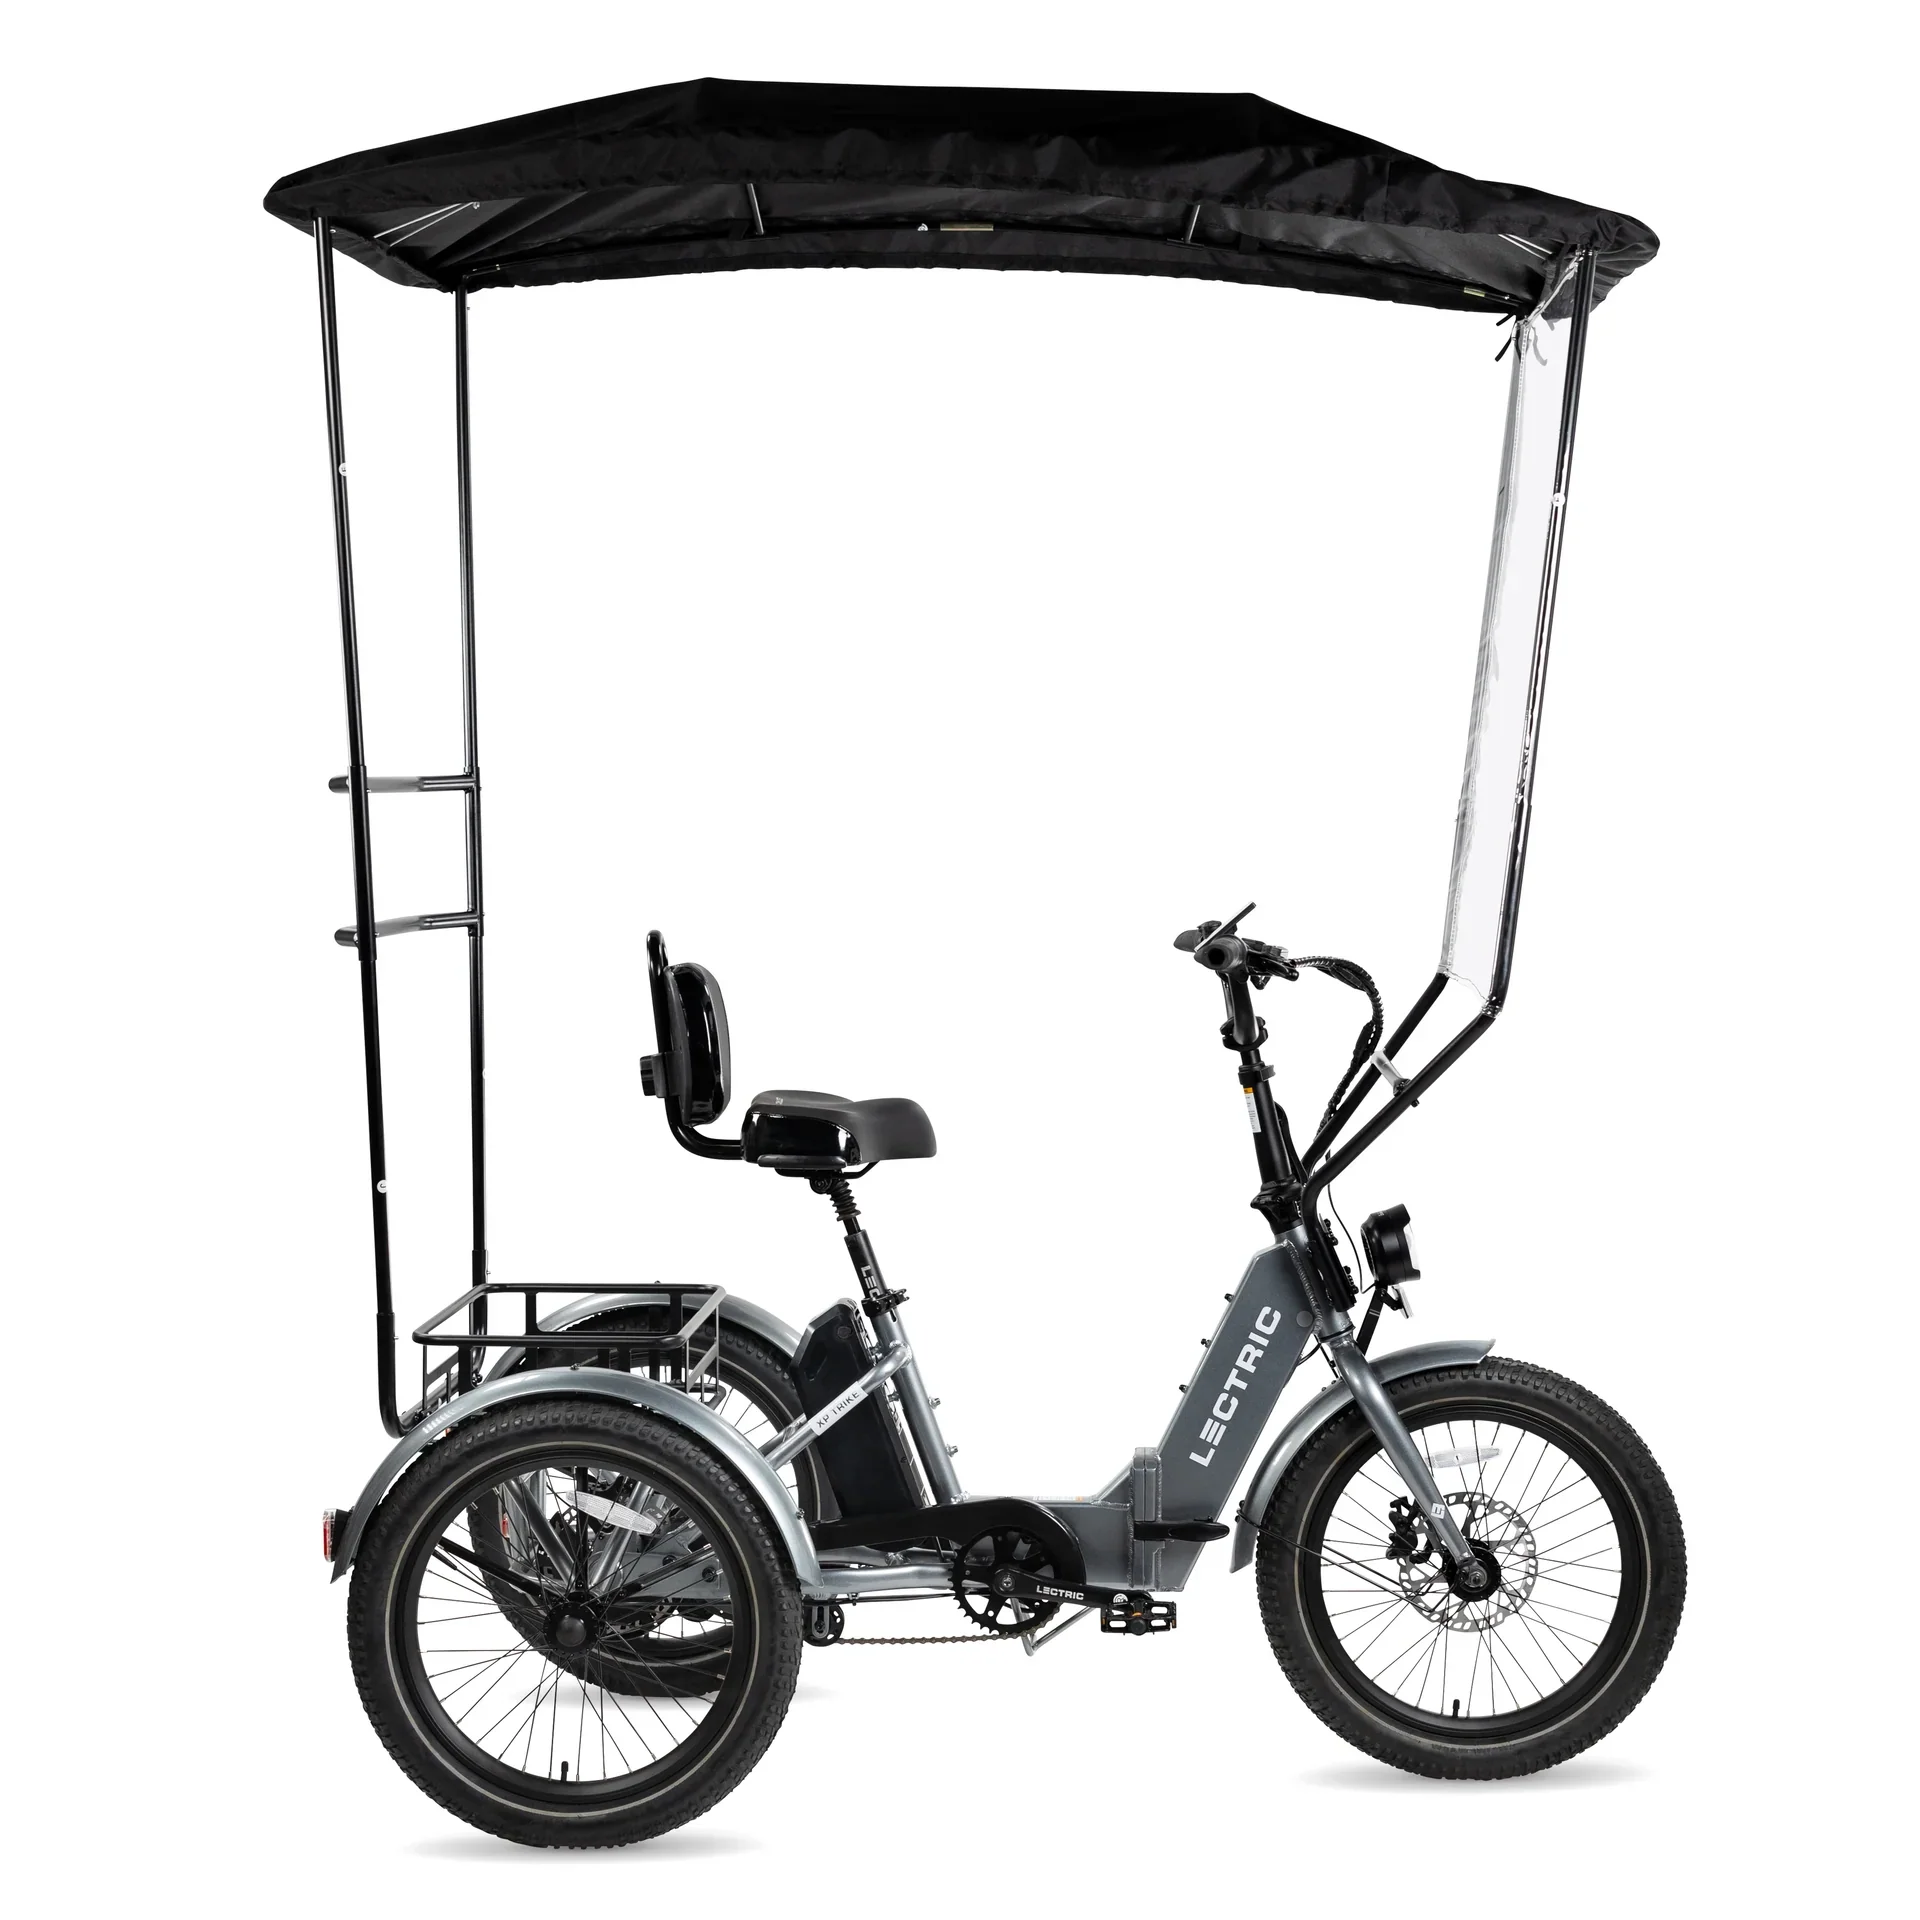
Lectric eBikes Trike Canopy
Lectric eBikes Trike Canopy
For Lectric eBikes products, we are no longer able to sell them online. They are only available for purchase in person at our warehouse.
Product Requirements:
- To properly install the Trike Canopy, the Large Basket (sold separately) must be installed on the rear rack of the XP Trike.
Compatibility:
- Lectric XP Trike (Models 1 & 2)
What's in the Box:
- (1) Trike Canopy (assembly required)
Product Specifications:
- Canopy Material: 600D
- Windscreen Material: Polycarbonate
- Trike Dimensions with Canopy installed: 63″ x 30″ x 78.5″ (L x W x H)
Please note that Lectric have a strict no-return policy on accessories.
Trike Canopy Installation
Trike Canopy Installation
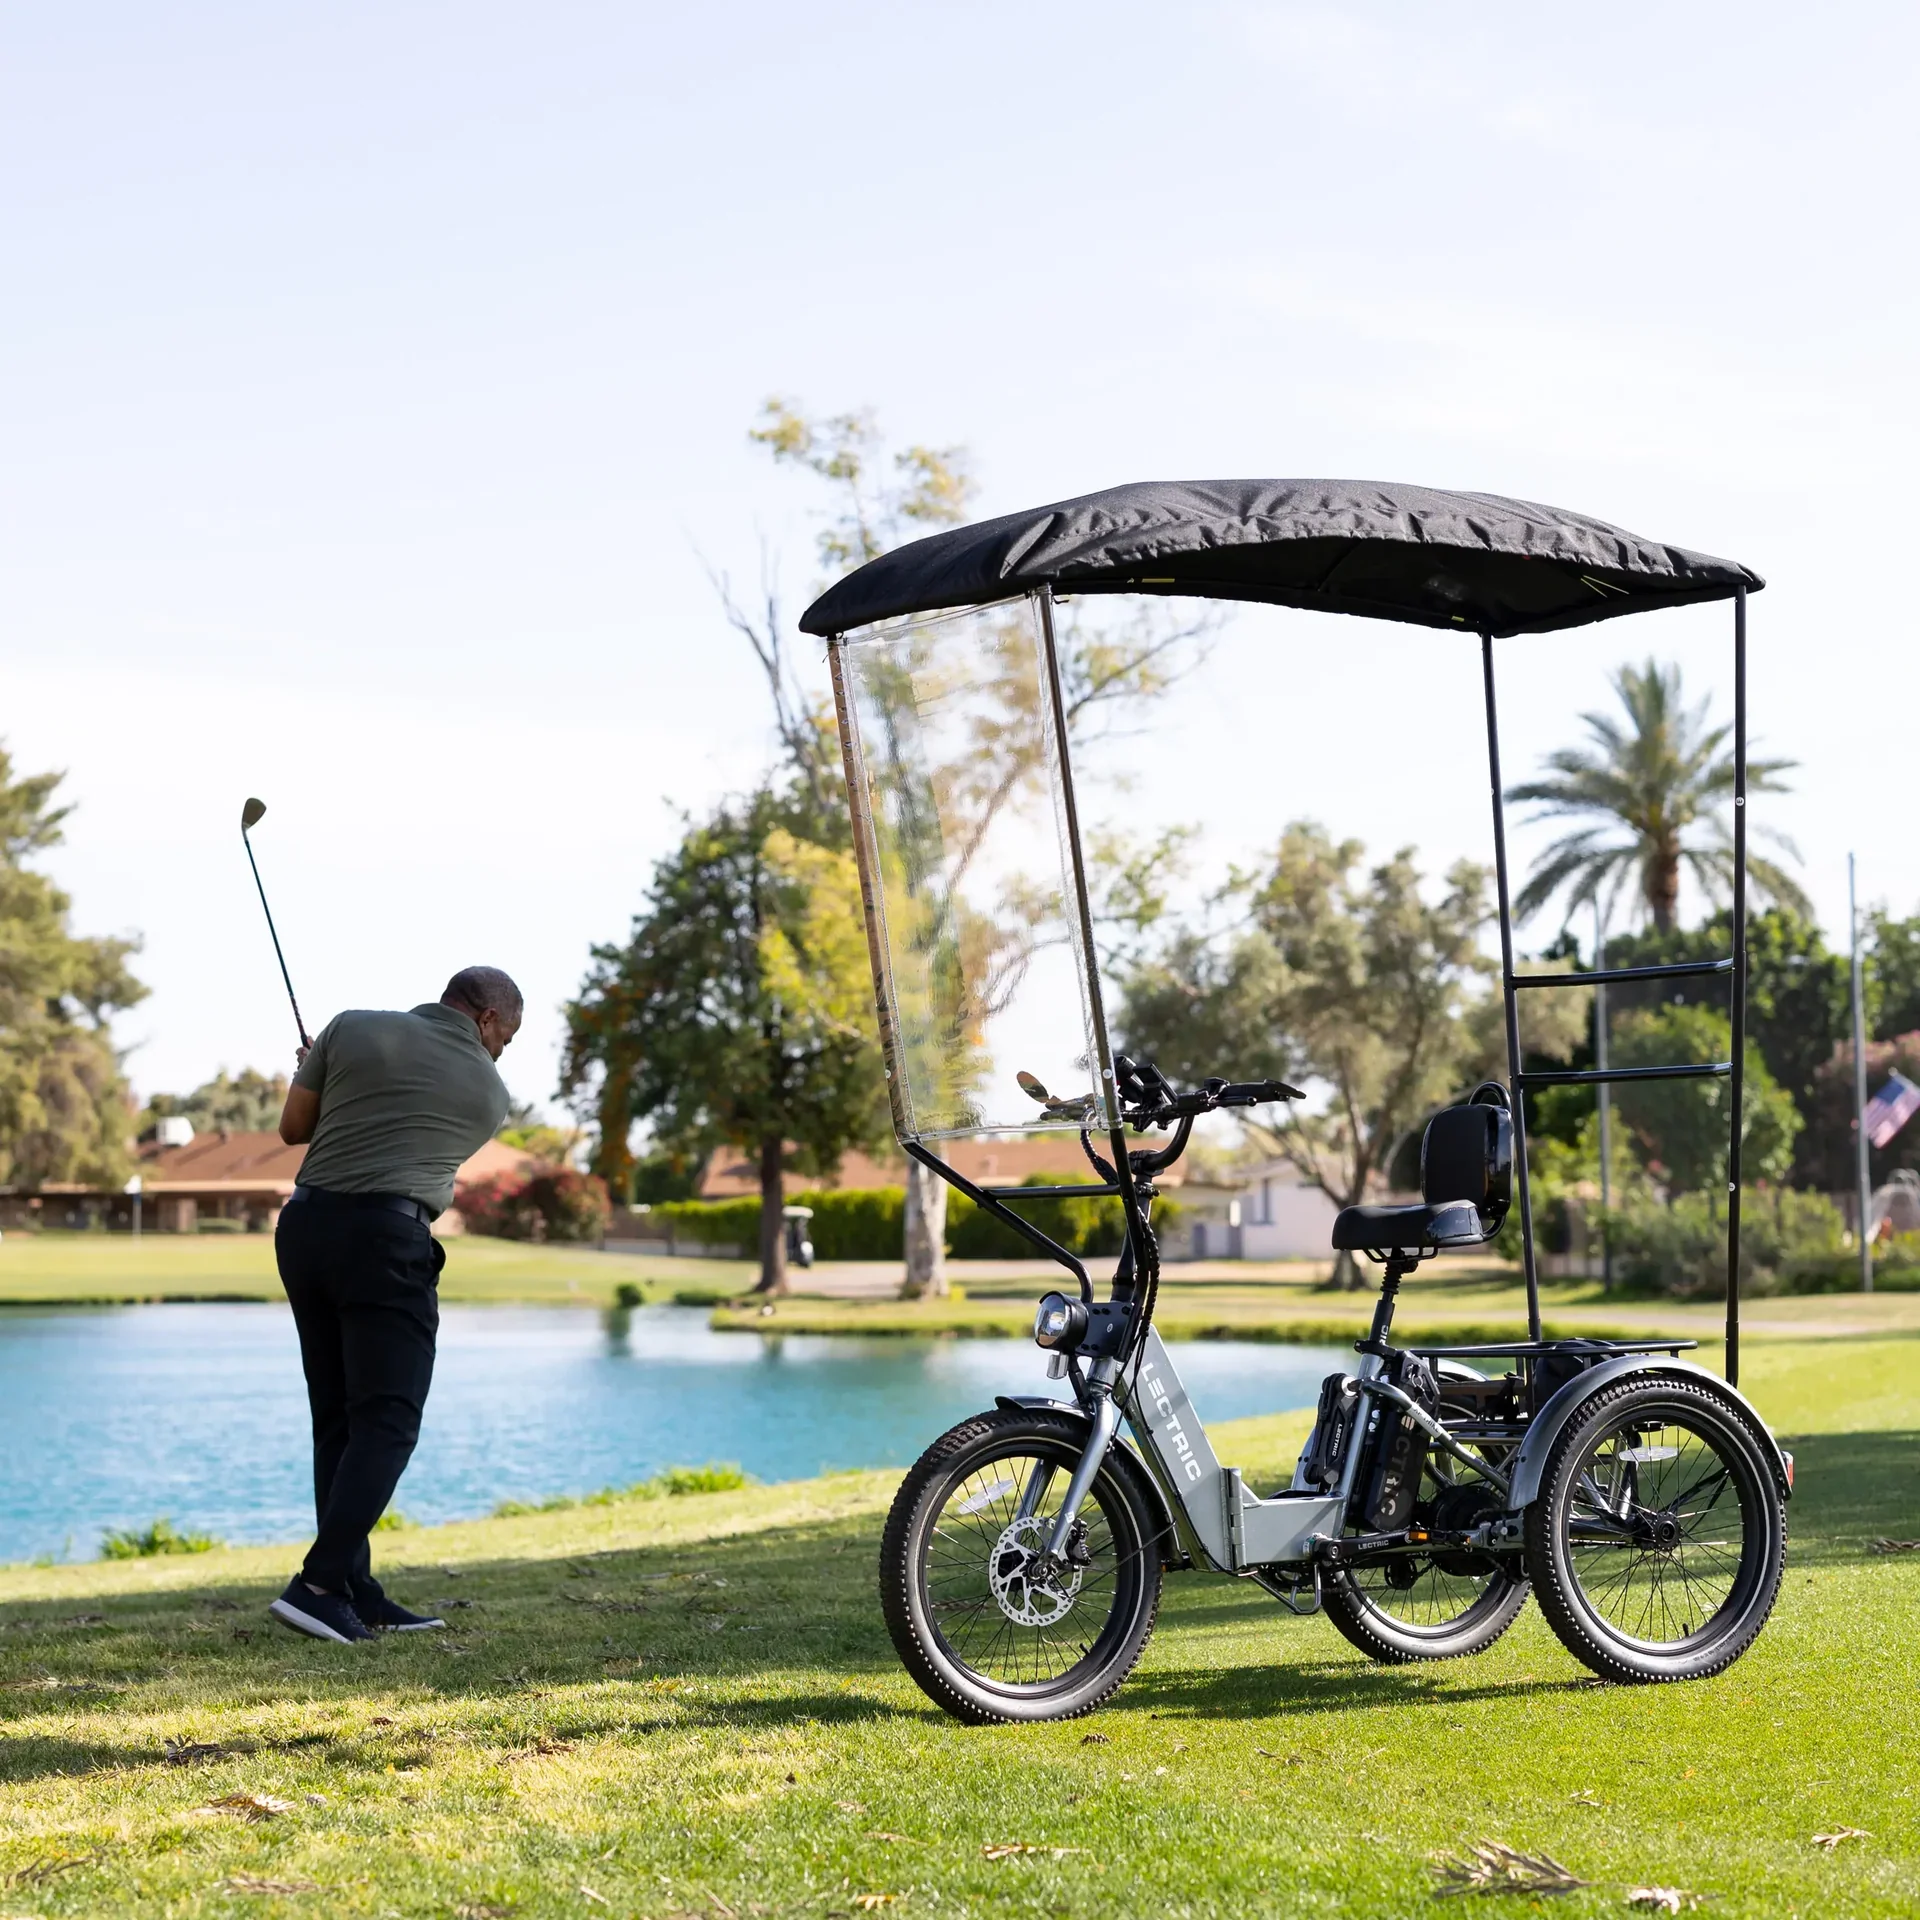
This accessory will keep you as cool as a cucumber while you cruise! Enjoy protection from the sun, wind, unwanted moisture, and bugs with the Trike Canopy.
Lectric eBikes strongly recommends using a friend to make the installation process a little easier.
To properly attach the Canopy to the XP Trike, the large basket must be installed on the rear rack. Assembly instructions for the large basket can be found below.
Basket Installation
Our steel baskets are great accessories for all your cargo needs!
Installing the baskets properly is very important for optimal safety. Written instructions are below:
Installing a Front Basket to the Bike Frame:
- Place the mounting bracket of the Front Basket up against the head tube of the bike frame while aligning the screw holes above the mounting points of the frame.
- Use a 4mm or 5mm Allen wrench (depending on your bike model) to fasten the screws with a washer so that the basket attaches to the rack.
- Perform a light pull test to ensure it is properly installed.
Installing a Basket to the Rear Rack:
Stand-alone baskets are intended to be installed on the rear rack, however, customers with our legacy front rack can also install them on the front.
- Place the basket above the rack while aligning the screw holes above the insertion points of the rack.
- Use a 4mm or 5mm Allen wrench (depending on your bike model) to fasten the screws with a washer so that the basket attaches to the rack.
- Perform a light pull test to ensure it is properly installed.
The basket may be placed perpendicular or parallel to the rear rack, depending on personal preference.
What's in the Box:
- (2) Curved Mounting Plates labeled as “A”
- (1) Headtube mounting plate labeled as “B”
- (1) Front Support Arm labeled as “C”
- (1) Front Left Arm labeled as “D(L)”
- (1) Front Right Arm labeled as “D(R)”
- (4) Poles labeled as “E”
- (2) Canopy Bars labeled as “F”
- (2) Single-fold canopy poles labeled as “G”
- (2) Curved canopy support bars labeled as “H”
- (1) Rear double-bar connector labeled as “I”
- (2) Rear poles labeled as “J”
- (1) Rear mounting bar labeled as “K”
- (2) Rear mounting plates labeled as “L”
- (1) Windscreen
- (1) Canopy Topper
- (2) Nylock nuts
- (8) Split washers
- (8) 5mm button head bolts- 12mm length
- (8) 5mm barrel bolts - 28mm length
- (4) 5mm low-profile bolts
- (2) 5mm Hex Keys
- (1) 5mm Allen Wrench
Check out our Lectric Service Center Video for an installation tutorial:
If you have any questions, please don't hesitate to contact our support team at [email protected] or 412-567-4390.
Product Information
Product Information
Shipping & Returns
Shipping & Returns

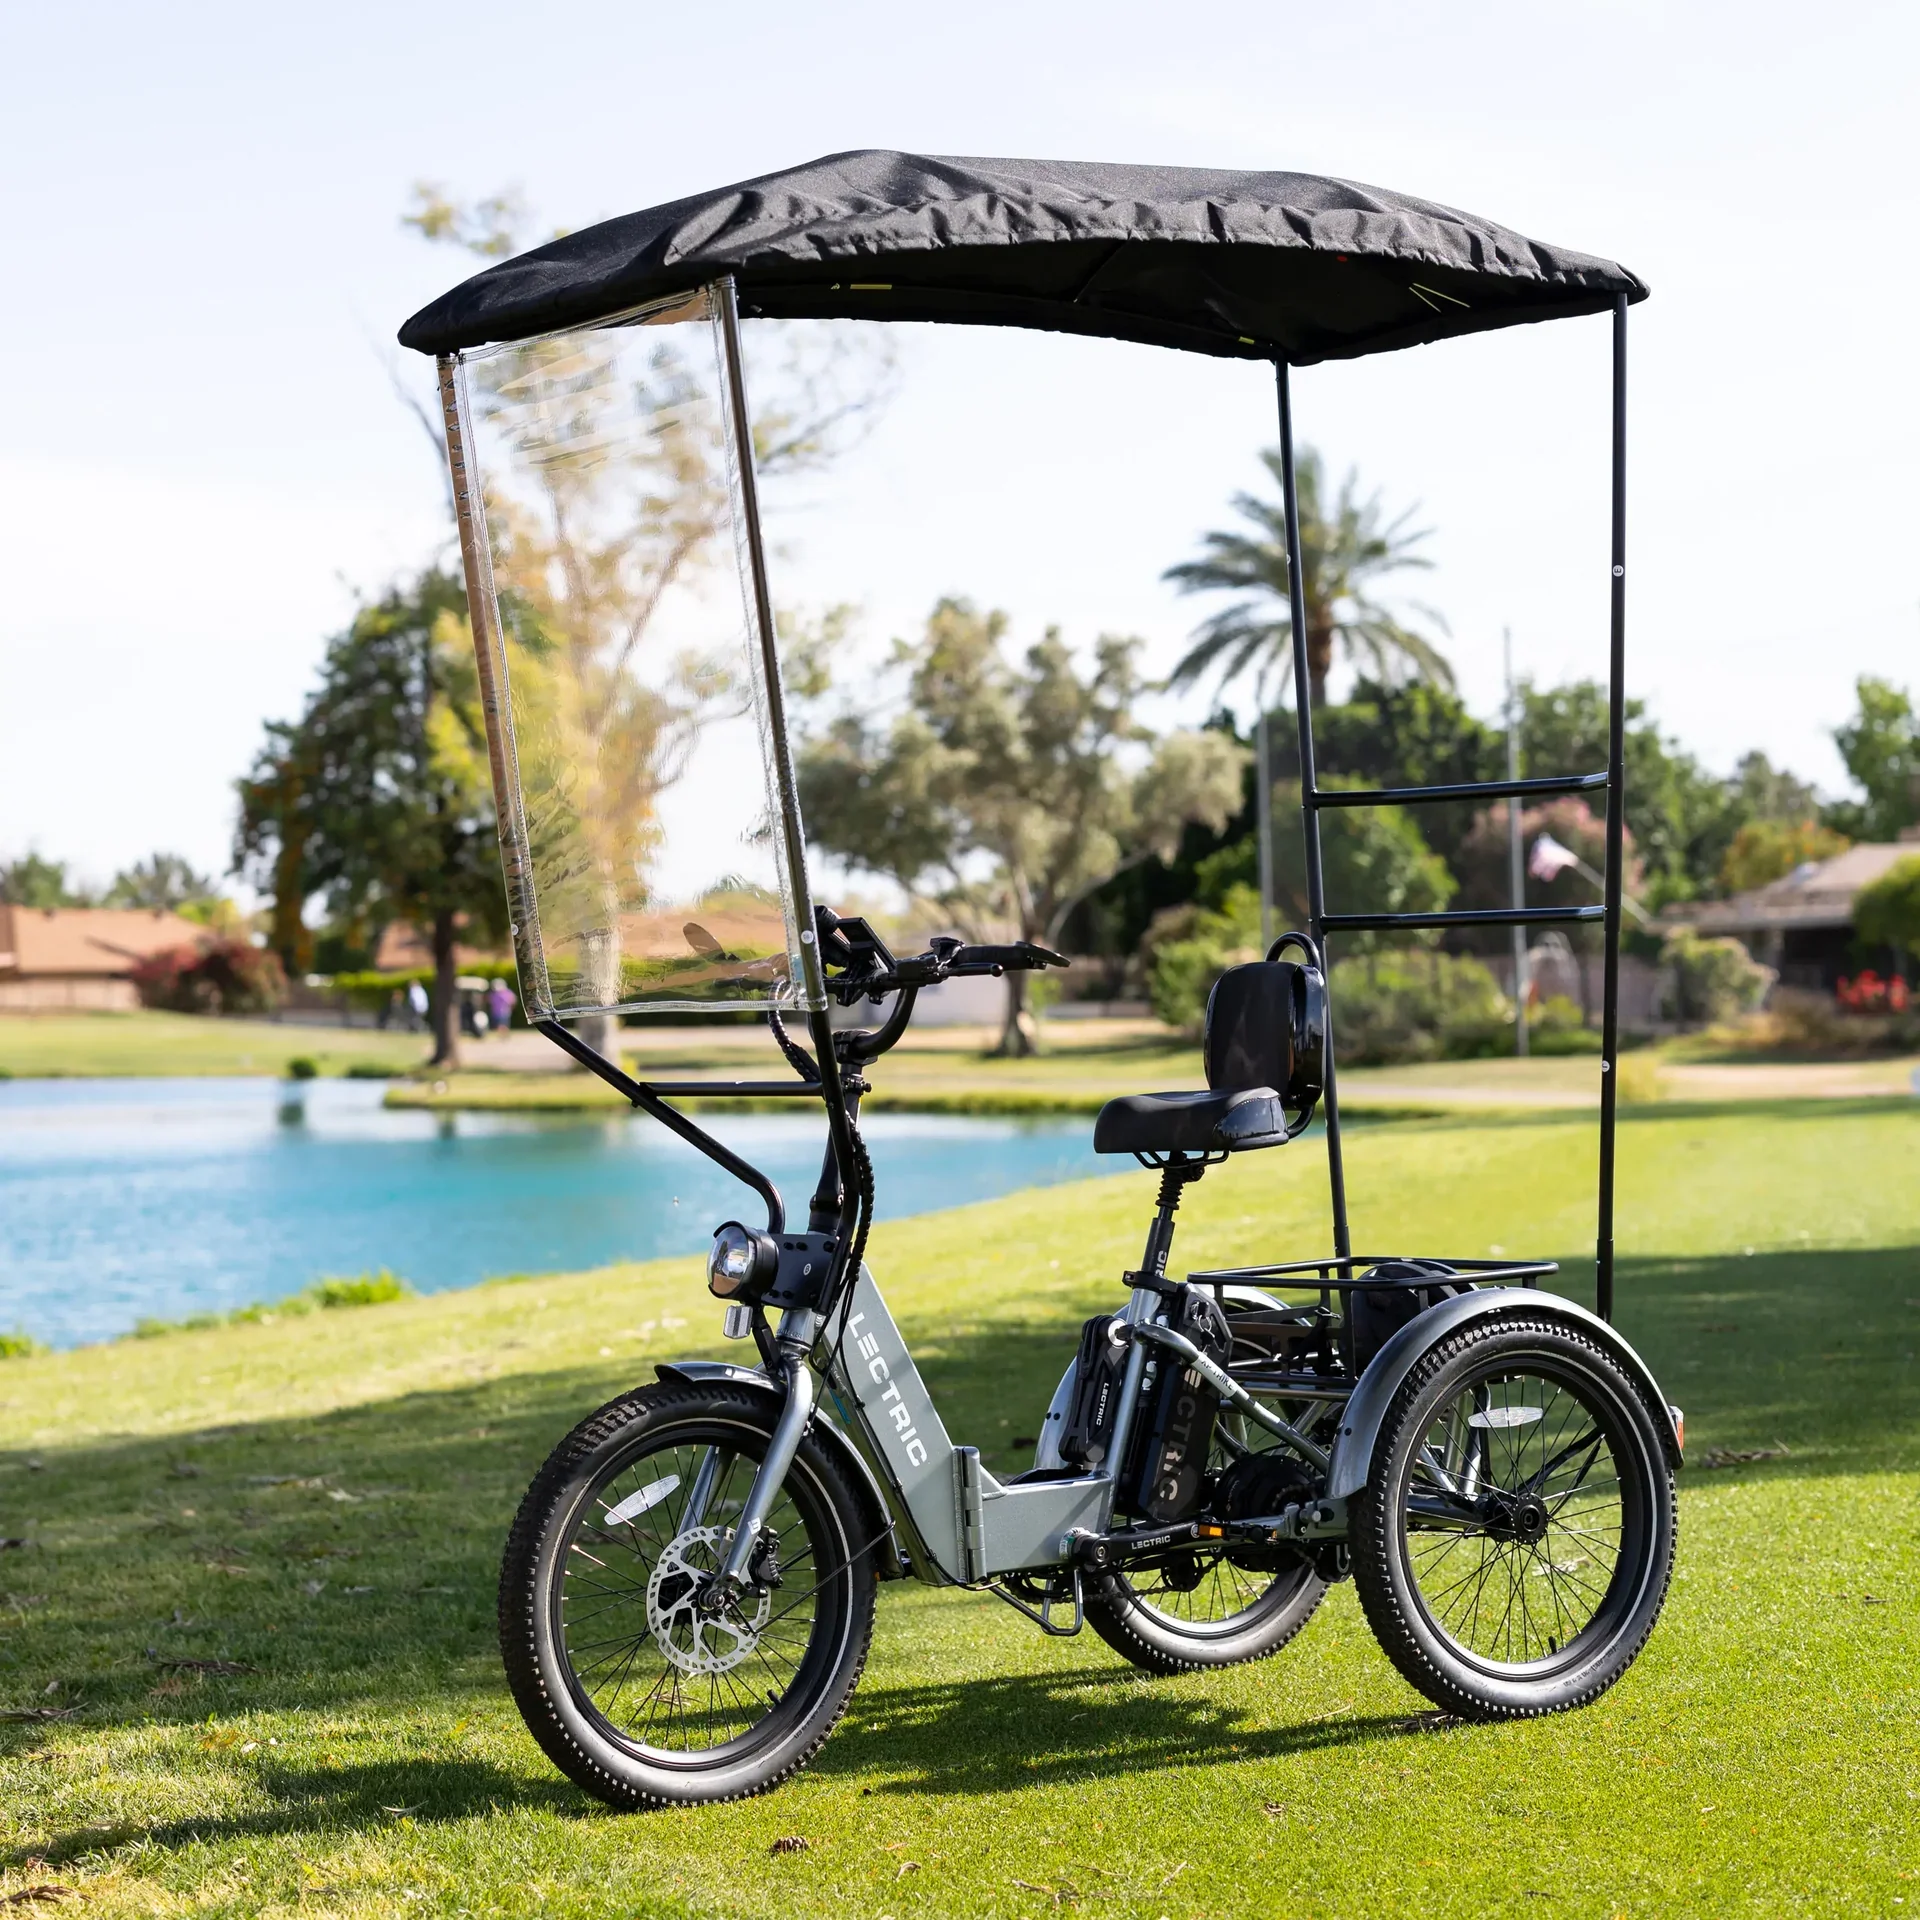
Lectric eBikes Trike Canopy
Lectric eBikes Trike Canopy
Lectric eBikes Trike Canopy
For Lectric eBikes products, we are no longer able to sell them online. They are only available for purchase in person at our warehouse.
Product Requirements:
- To properly install the Trike Canopy, the Large Basket (sold separately) must be installed on the rear rack of the XP Trike.
Compatibility:
- Lectric XP Trike (Models 1 & 2)
What's in the Box:
- (1) Trike Canopy (assembly required)
Product Specifications:
- Canopy Material: 600D
- Windscreen Material: Polycarbonate
- Trike Dimensions with Canopy installed: 63″ x 30″ x 78.5″ (L x W x H)
Please note that Lectric have a strict no-return policy on accessories.
Trike Canopy Installation
Trike Canopy Installation
This accessory will keep you as cool as a cucumber while you cruise! Enjoy protection from the sun, wind, unwanted moisture, and bugs with the Trike Canopy.
Lectric eBikes strongly recommends using a friend to make the installation process a little easier.
To properly attach the Canopy to the XP Trike, the large basket must be installed on the rear rack. Assembly instructions for the large basket can be found below.
Basket Installation
Our steel baskets are great accessories for all your cargo needs!
Installing the baskets properly is very important for optimal safety. Written instructions are below:
Installing a Front Basket to the Bike Frame:
- Place the mounting bracket of the Front Basket up against the head tube of the bike frame while aligning the screw holes above the mounting points of the frame.
- Use a 4mm or 5mm Allen wrench (depending on your bike model) to fasten the screws with a washer so that the basket attaches to the rack.
- Perform a light pull test to ensure it is properly installed.
Installing a Basket to the Rear Rack:
Stand-alone baskets are intended to be installed on the rear rack, however, customers with our legacy front rack can also install them on the front.
- Place the basket above the rack while aligning the screw holes above the insertion points of the rack.
- Use a 4mm or 5mm Allen wrench (depending on your bike model) to fasten the screws with a washer so that the basket attaches to the rack.
- Perform a light pull test to ensure it is properly installed.
The basket may be placed perpendicular or parallel to the rear rack, depending on personal preference.
What's in the Box:
- (2) Curved Mounting Plates labeled as “A”
- (1) Headtube mounting plate labeled as “B”
- (1) Front Support Arm labeled as “C”
- (1) Front Left Arm labeled as “D(L)”
- (1) Front Right Arm labeled as “D(R)”
- (4) Poles labeled as “E”
- (2) Canopy Bars labeled as “F”
- (2) Single-fold canopy poles labeled as “G”
- (2) Curved canopy support bars labeled as “H”
- (1) Rear double-bar connector labeled as “I”
- (2) Rear poles labeled as “J”
- (1) Rear mounting bar labeled as “K”
- (2) Rear mounting plates labeled as “L”
- (1) Windscreen
- (1) Canopy Topper
- (2) Nylock nuts
- (8) Split washers
- (8) 5mm button head bolts- 12mm length
- (8) 5mm barrel bolts - 28mm length
- (4) 5mm low-profile bolts
- (2) 5mm Hex Keys
- (1) 5mm Allen Wrench
Check out our Lectric Service Center Video for an installation tutorial:
If you have any questions, please don't hesitate to contact our support team at [email protected] or 412-567-4390.
Original: $199.00
-65%$199.00
$69.65Product Information
Product Information
Shipping & Returns
Shipping & Returns
Description
Lectric eBikes Trike Canopy
For Lectric eBikes products, we are no longer able to sell them online. They are only available for purchase in person at our warehouse.
Product Requirements:
- To properly install the Trike Canopy, the Large Basket (sold separately) must be installed on the rear rack of the XP Trike.
Compatibility:
- Lectric XP Trike (Models 1 & 2)
What's in the Box:
- (1) Trike Canopy (assembly required)
Product Specifications:
- Canopy Material: 600D
- Windscreen Material: Polycarbonate
- Trike Dimensions with Canopy installed: 63″ x 30″ x 78.5″ (L x W x H)
Please note that Lectric have a strict no-return policy on accessories.
Trike Canopy Installation
Trike Canopy Installation
This accessory will keep you as cool as a cucumber while you cruise! Enjoy protection from the sun, wind, unwanted moisture, and bugs with the Trike Canopy.
Lectric eBikes strongly recommends using a friend to make the installation process a little easier.
To properly attach the Canopy to the XP Trike, the large basket must be installed on the rear rack. Assembly instructions for the large basket can be found below.
Basket Installation
Our steel baskets are great accessories for all your cargo needs!
Installing the baskets properly is very important for optimal safety. Written instructions are below:
Installing a Front Basket to the Bike Frame:
- Place the mounting bracket of the Front Basket up against the head tube of the bike frame while aligning the screw holes above the mounting points of the frame.
- Use a 4mm or 5mm Allen wrench (depending on your bike model) to fasten the screws with a washer so that the basket attaches to the rack.
- Perform a light pull test to ensure it is properly installed.
Installing a Basket to the Rear Rack:
Stand-alone baskets are intended to be installed on the rear rack, however, customers with our legacy front rack can also install them on the front.
- Place the basket above the rack while aligning the screw holes above the insertion points of the rack.
- Use a 4mm or 5mm Allen wrench (depending on your bike model) to fasten the screws with a washer so that the basket attaches to the rack.
- Perform a light pull test to ensure it is properly installed.
The basket may be placed perpendicular or parallel to the rear rack, depending on personal preference.
What's in the Box:
- (2) Curved Mounting Plates labeled as “A”
- (1) Headtube mounting plate labeled as “B”
- (1) Front Support Arm labeled as “C”
- (1) Front Left Arm labeled as “D(L)”
- (1) Front Right Arm labeled as “D(R)”
- (4) Poles labeled as “E”
- (2) Canopy Bars labeled as “F”
- (2) Single-fold canopy poles labeled as “G”
- (2) Curved canopy support bars labeled as “H”
- (1) Rear double-bar connector labeled as “I”
- (2) Rear poles labeled as “J”
- (1) Rear mounting bar labeled as “K”
- (2) Rear mounting plates labeled as “L”
- (1) Windscreen
- (1) Canopy Topper
- (2) Nylock nuts
- (8) Split washers
- (8) 5mm button head bolts- 12mm length
- (8) 5mm barrel bolts - 28mm length
- (4) 5mm low-profile bolts
- (2) 5mm Hex Keys
- (1) 5mm Allen Wrench
Check out our Lectric Service Center Video for an installation tutorial:
If you have any questions, please don't hesitate to contact our support team at [email protected] or 412-567-4390.